Business Buffet Pants

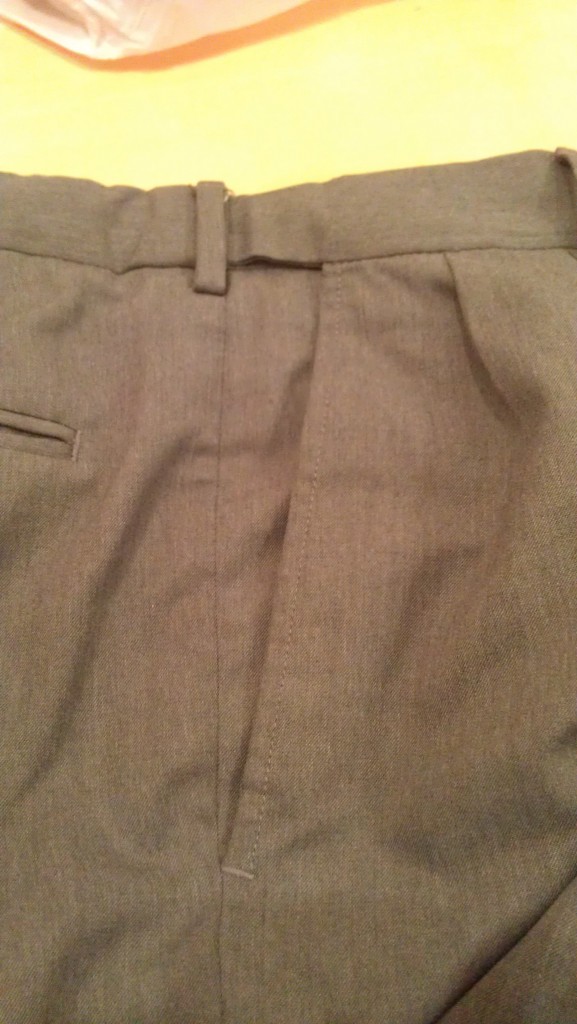
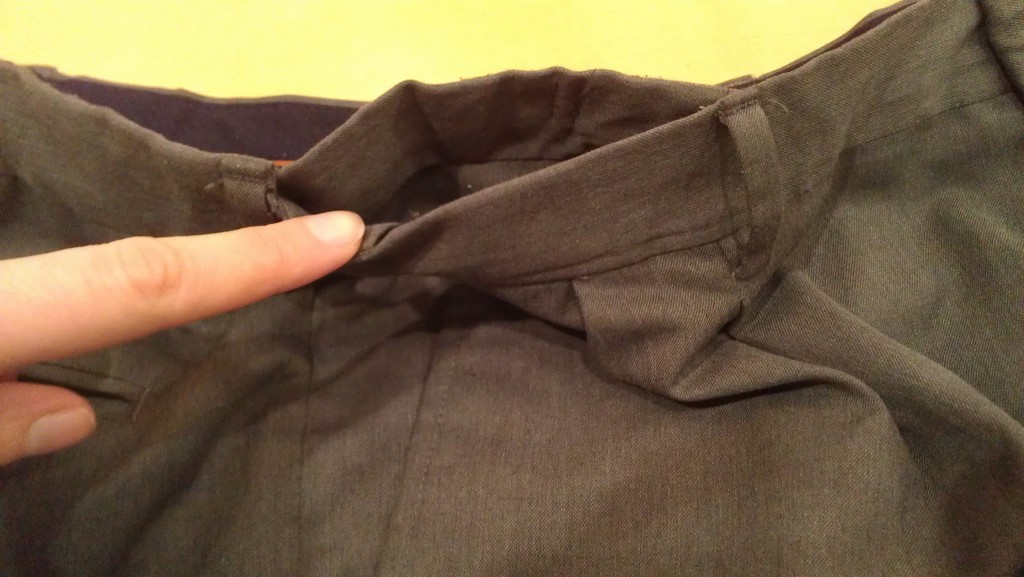
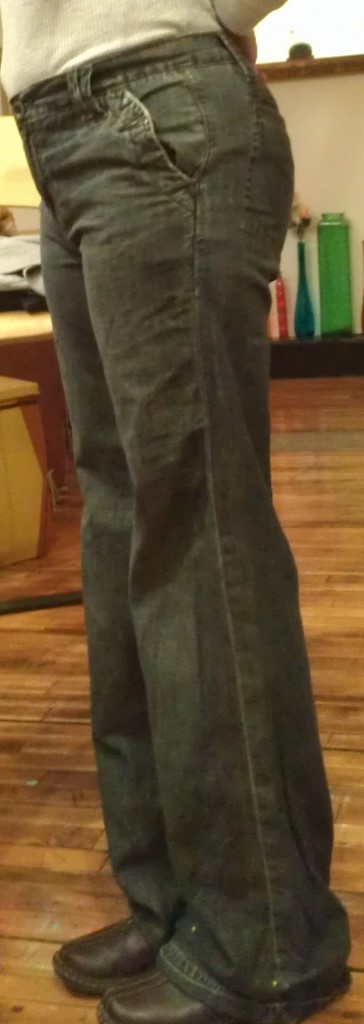
I repaired the hem on these pants for a client and noticed a cool effect at the waist.

First View: side pocket lying flat–

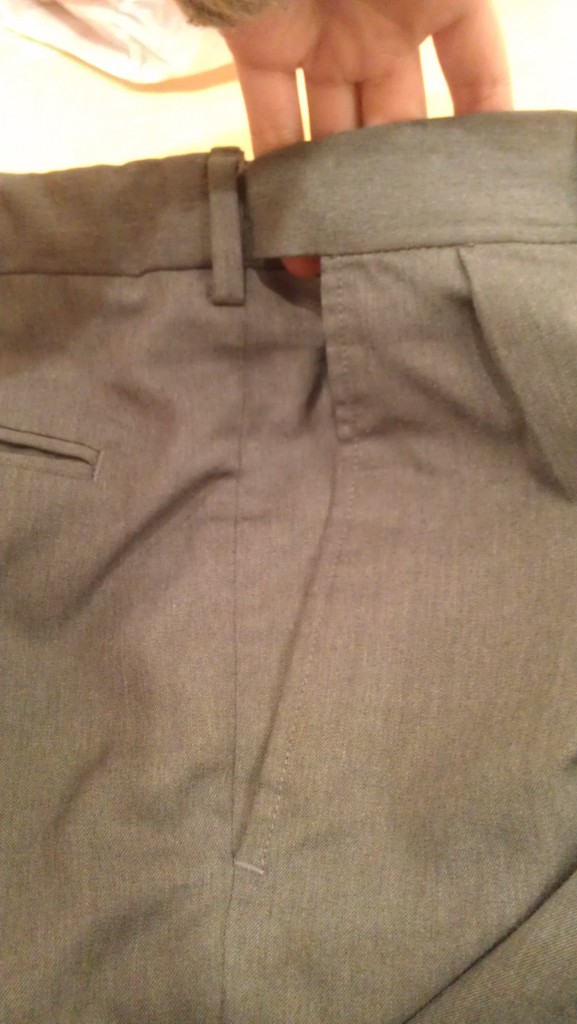
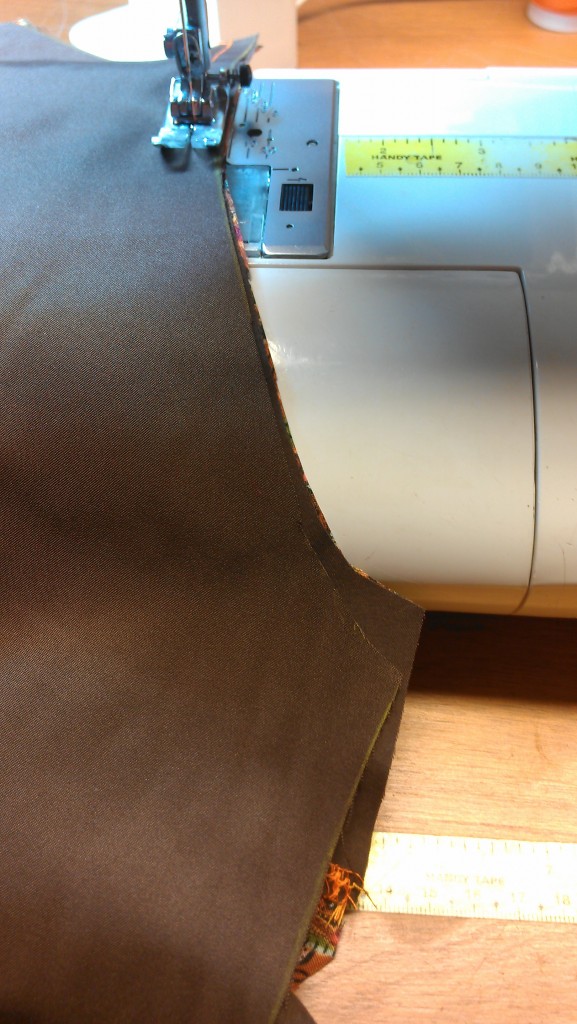
Second View: 2-layered waistband; the upper layer slips quietly behind a beltloop into a casing made from the back of the waistband, where it hides some elastic that doesn’t visibly rumple the outside–

Third View: sneaky!–

Buffet pants you can wear to a business meeting!

Marsupial Pants

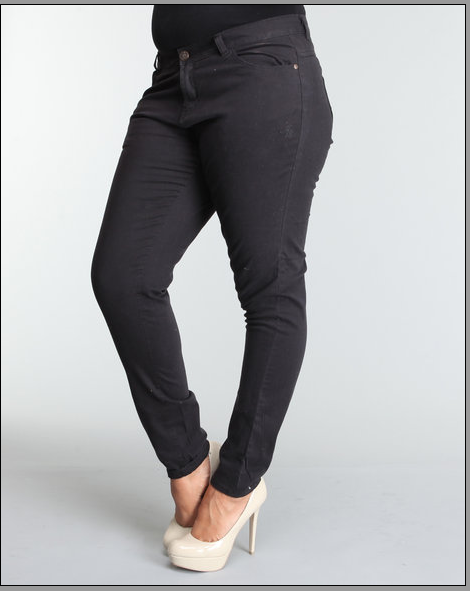
While reading an article on what brands of jeans have been the most popular this year, Apple Bottoms came up. Their claim is that they accentuate curves instead of trying to hide them. Since I’ve spent the past decade-plus buying pants to fit over my hips and finding the American-sizing assumption to be that someone with big hips must also be big-waisted, and I wind up sagging a little by default, I checked them out. Only to find an entire page full of perfectly normal-sized women, most of whom do NOT have big hips, or really much to speak of in hips at all. The one little nod to curviness is a couple of pictures of larger sizes, looking really unflattering. What is that pouch below the fly in the front? She could fit a roll of tube socks in there, or a couple.

I’m not going to be all size-ist and say large women should never wear tight clothes, and I’ve seen skinny girls shoved into too-small garments that make them look like sausage links; it’s all about the cut and about getting the right size that determines whether tight can work.

I’ve seen well-designed jeans on larger women, and I’ve seen a nice pair of pants make it look like someone’s lost weight without her having to hold her breath to get into them. These pants just make her butt look lower, like someone dropped a bag of sand down the back and it hasn’t slid down all the way because the skinny legs are too tight.

The muffin-top in the front implies she’s not as proud of her curves as they would have you believe and she’s attempting to wear a size smaller so she doesn’t have to admit to herself she’s a 24 or whatever the heck number is now “fat” in the random-number women’s-sizing system that puts my size range anywhere from 7 to 12.

I showed this picture to D., who said the pants looked like they were designed for the upper body and she just stuck her legs through the sleeves. Like skants, but with the neck-hole / crotch sewn shut.

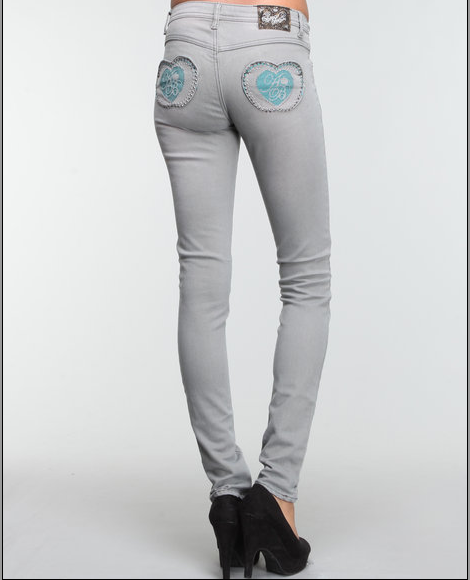
Then here’s a back-shot of a skinny girl with curves only in the back. Laterally, she’s s flat as a brick. Then these pants take what is possibly a nice butt and flatten/lengthen/drop it. You can see from the right side that adds nothing that any shapeliness is strictly the willpower and determination of her butt to overcome these pants. Then the mom-pants waistband appears to be actually bigger than the hips.

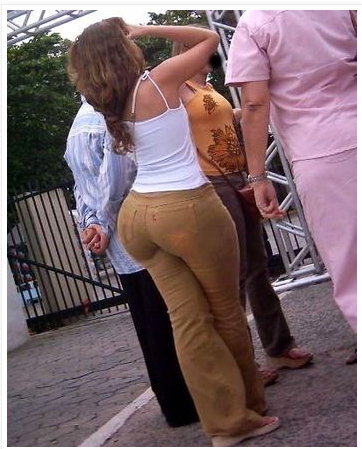
Here is an example of *actual* big hips:

I want to know where this woman found tight pants with a small waist or if she got them tailored. (Or if that strategic blur says this is photoshopped–or else the effect of a gravitational pull.) Image gotten from here, though the wording of the text implies it’s some sort of spam site.

The top pair is significantly less curve-flattering than Lane Bryant. I suspect the “adds curves” notion of this brand of pants is just that any woman who is willing to wear an “I have curves” apple on her ass is probably making a statement, as described in this quote by The Last Psychiatrist: “The brunette who dyes her hair blonde isn’t  trying to look Swedish, the point is to make sure everyone knows it’s artificial because it’s a signal: I don’t want blonde hair, I want to be a <<blonde>>.”

These don’t have to be actually nice butts because they’re <<apple bottoms>>. (Though, seriously, have you really looked at the shape of an apple? Maybe there IS truth in advertising . . . )


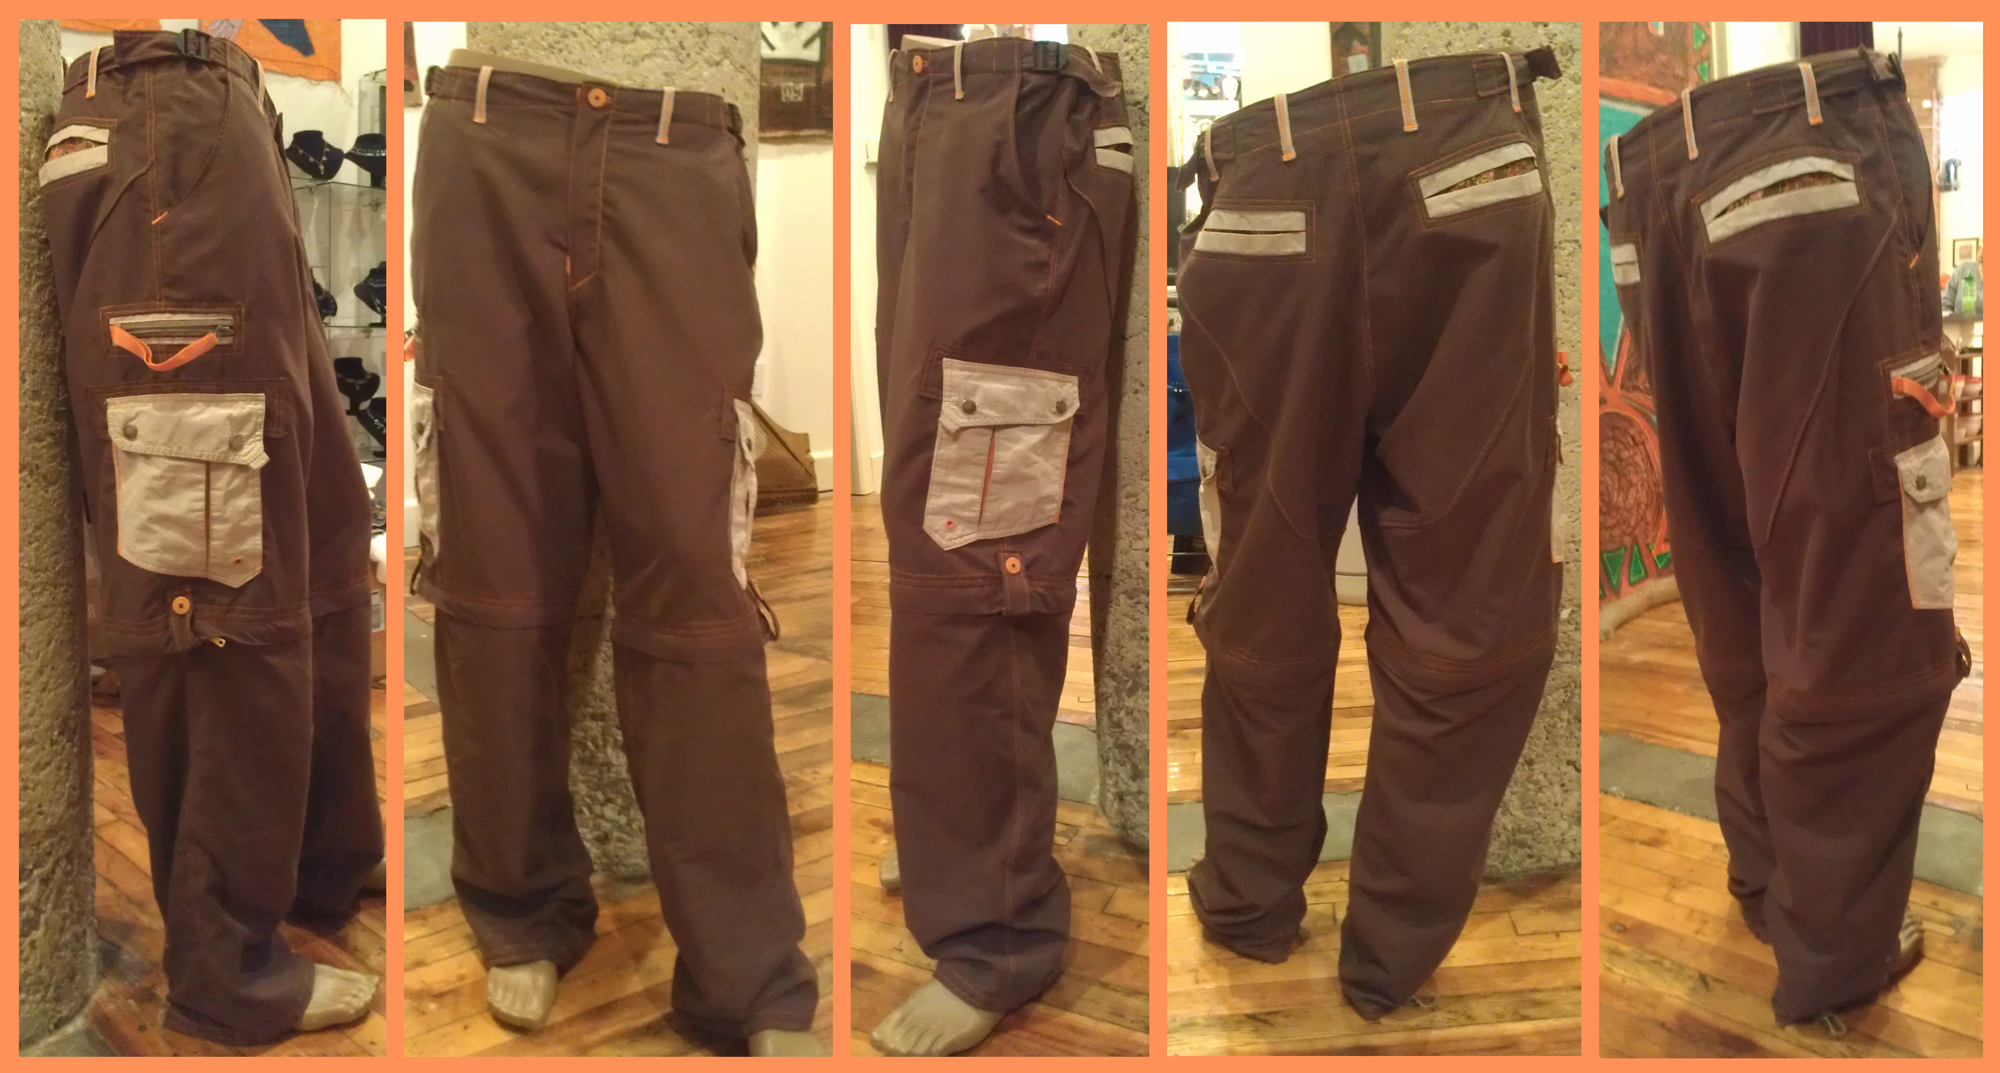
Christmas Pants

The project: pants like the black ones I made to be like the blue ones that died. You may remember the project from last September: black pants


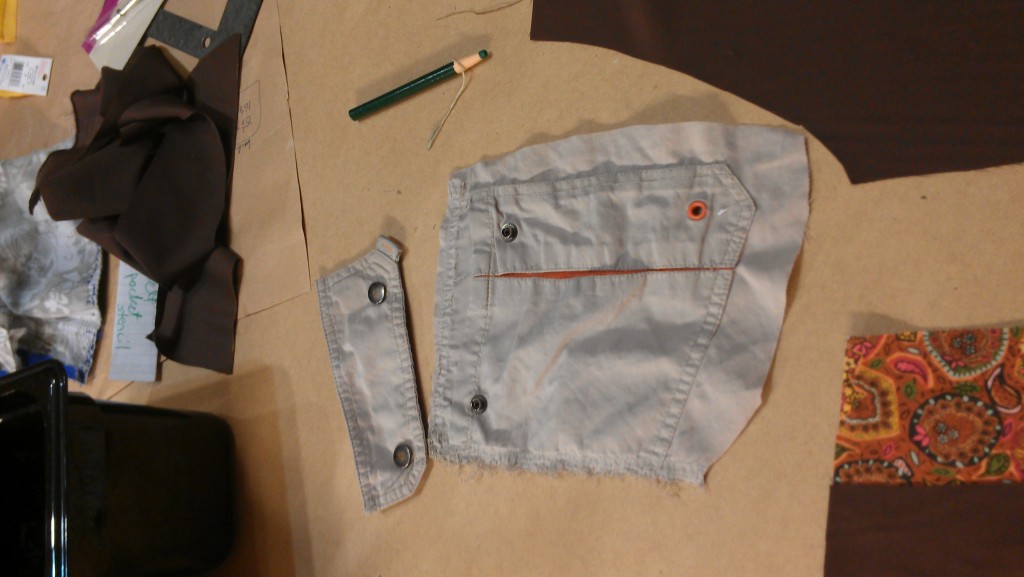
The previous pants used some pockets from the pair I copied and provided a delightful color contrast. This time I went to a thrift store and wandered through the men’s section in search of unusual pockets. I found a pair of khaki shorts with orange accents in a little boy’s size, so only the side pockets were usable; the back pockets were too small for normal people hands to fit inside.

I had been putting off starting on these pants because I couldn’t find any good fabrics. I ordered a sample online of some peachskin fabric, but it was the same flowy stuff as the black pants and I had really wanted to do something different. In my head, I saw myself using that . . . umm, I’m not sure what to call it . . . that slightly crinkly, stiff fabric they use on sporty pants; almost like it’s been treated for waterproof or something, but it probably hasn’t? Anyway, that stuff. I thought maybe if I kept checking back, some might turn up in the warehouse districts that get random fabrics and even sometimes have relatively cheap men’s suiting and what-have-you.

I went to the warehouse fabric district again a couple weeks ago and found a scrap of brown peachskin that was stiffer and less floopy, closer to the original pants and more sporty than the black fabric I had used last time. Since I knew the end user liked fun colors, I asked the shopkeep for anything besides brown; no luck, but they had more of the brown on a roll.

So I texted the client to ask if brown was okay. She wrote back that she had lost my number, and had been trying to figure out how to get ahold of me to let me know she’d like the Christmas pair to be brown. Actually, the verb up there, “wrote,” doesn’t really describe her message back, but I’ll leave that to your imagination.

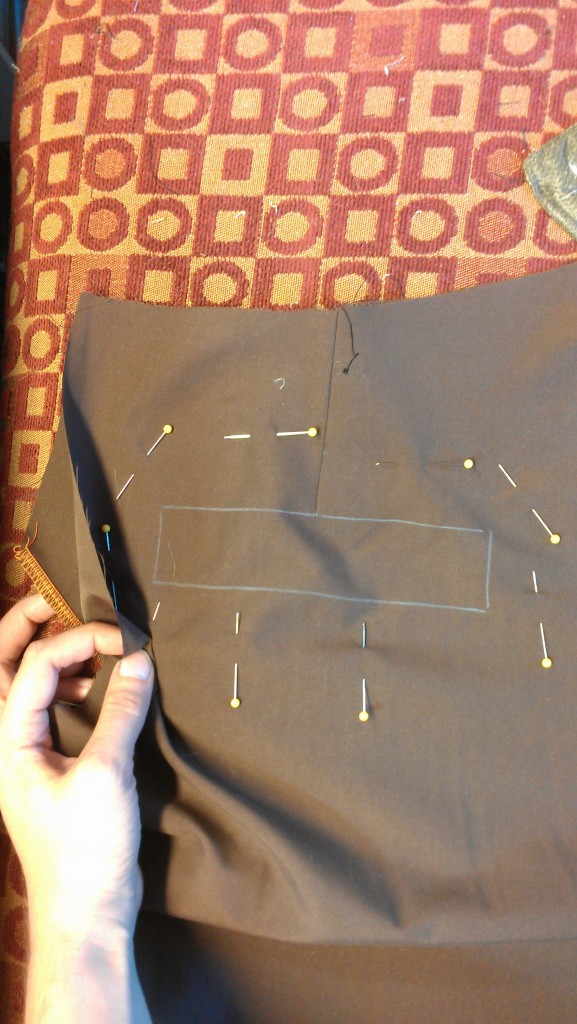
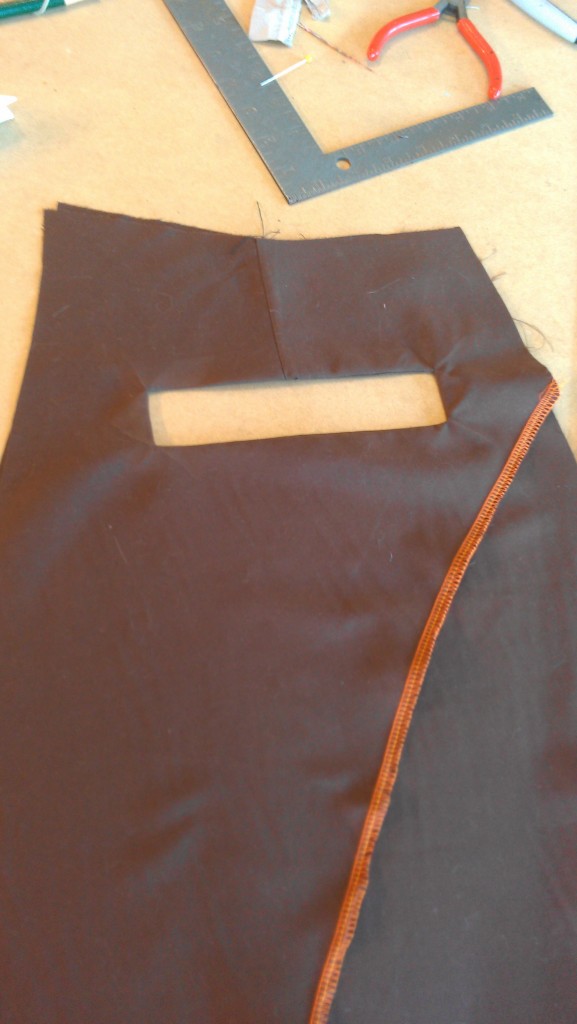
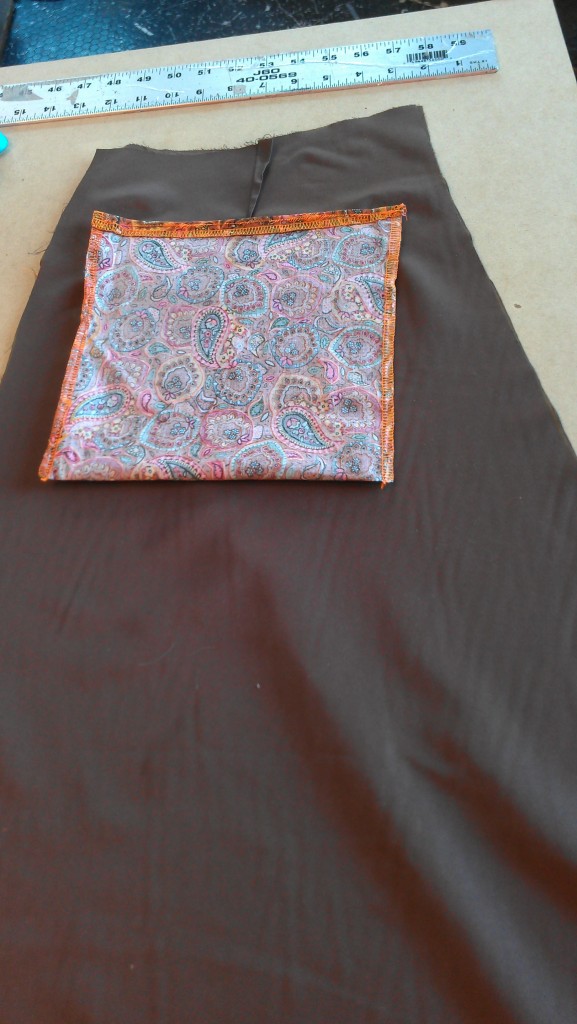
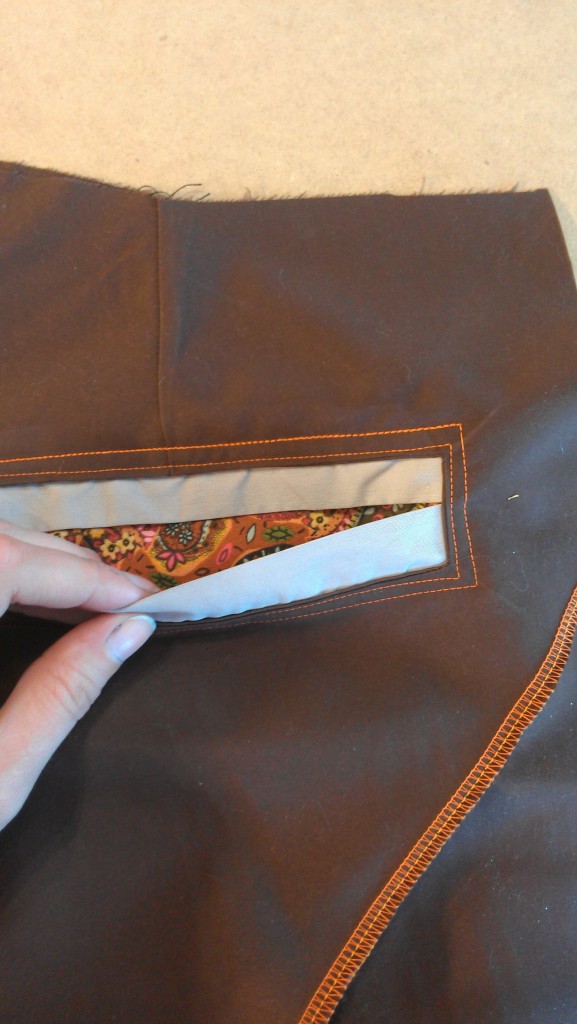
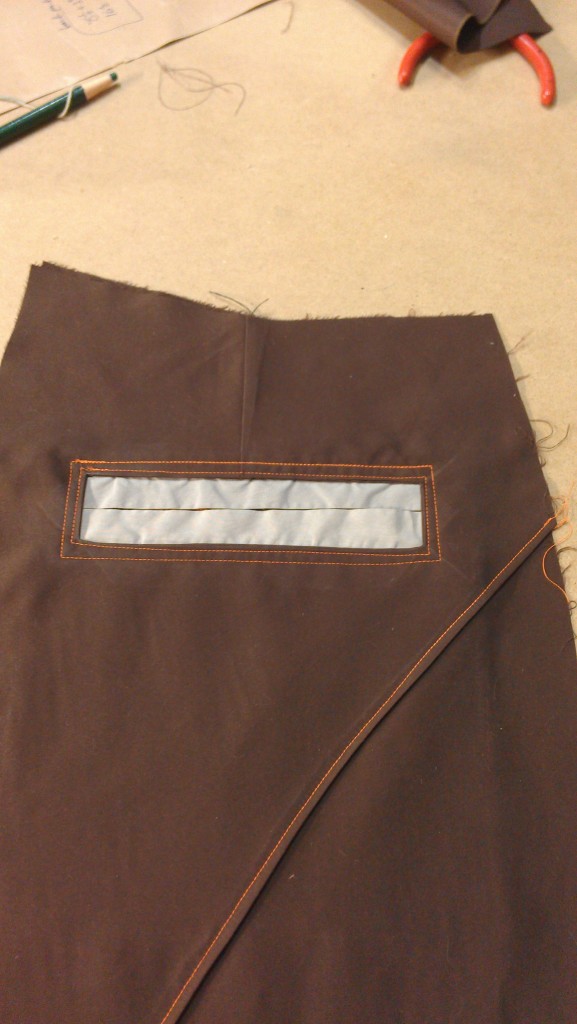
All my Constant Readers (as Stephen King would say) and my Alert Readers (as Dave Barry would say) might recognize nearly the same 2 photos from the black pair’s back pockets:

Above, I stuck my hand in the shot to demonstrate that the top layer (edged in orange thread) is pinned below the lower layer; the darts on both layers have already been put in.

Below: stitched, snipped, flipped right side out:

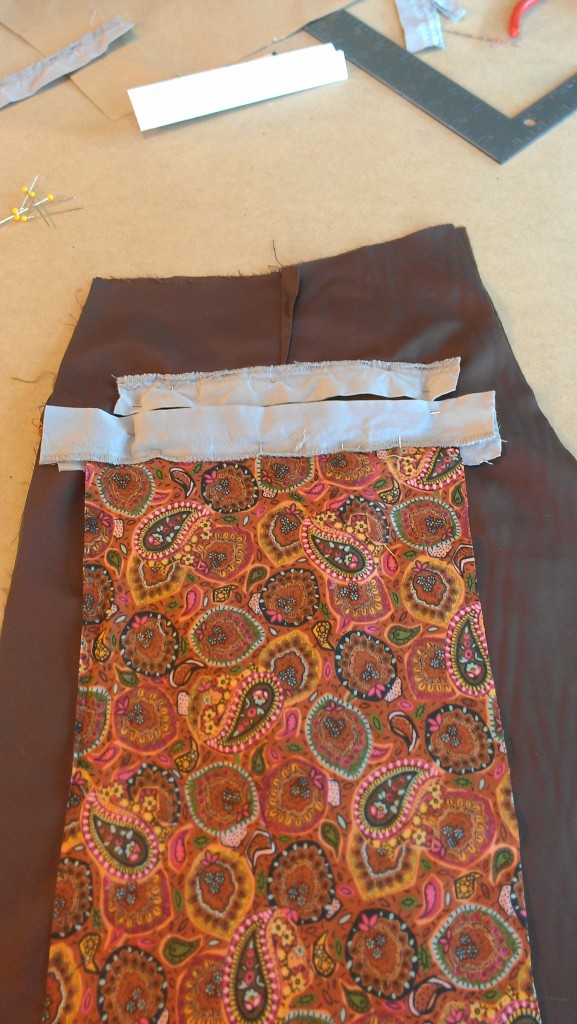
I used the cuffs of the khaki shorts for the contrast on the pockets, and a cotton fabric in complementary colors for the pouch:

Finished pocket from the inside:

From the outside:

After top-stitching the butt-protector, reinforcing layer, or whatever the heck that panel is called:

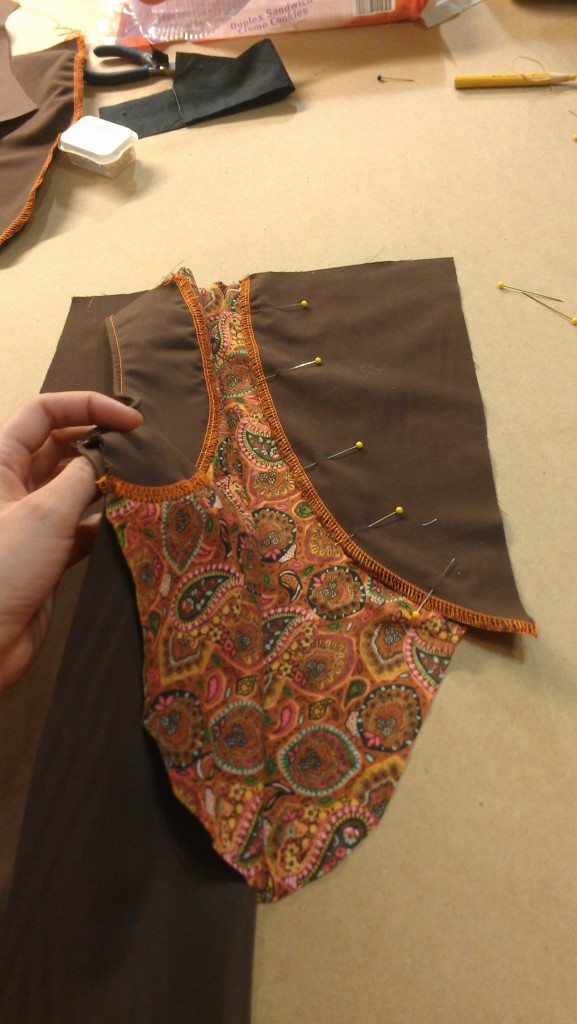
I attached the smaller facing (under my hand) onto the front pocket pouch first, then sewed it to the pants themselves before pinning the back part of the facing to make sure it laid right.

Here’s a cool thing about the front facing on these pockets. I’m showing this out of order to try to be clearer–this is the seam that I am holding in my hand above:

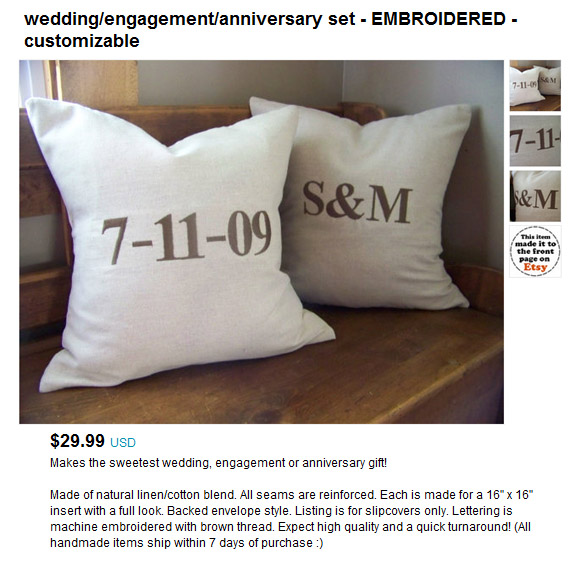
When they are lying flat and the top of the seam is lined up perfectly, the bottom of the curves are different by that much, though the total length of each is the same. This helps the pockets curve in a little when the pants are worn, rather than pooch out a little. It’s one of those things where sewing it not flat creates the illusion of it being flat. Kind of like how sewing square pillows to be square when they’re flat can give them rabbit ears, but sewing them with rounded corners produces a square pillow when it’s stuffed.

(Pillows spotted via Regretsy.)


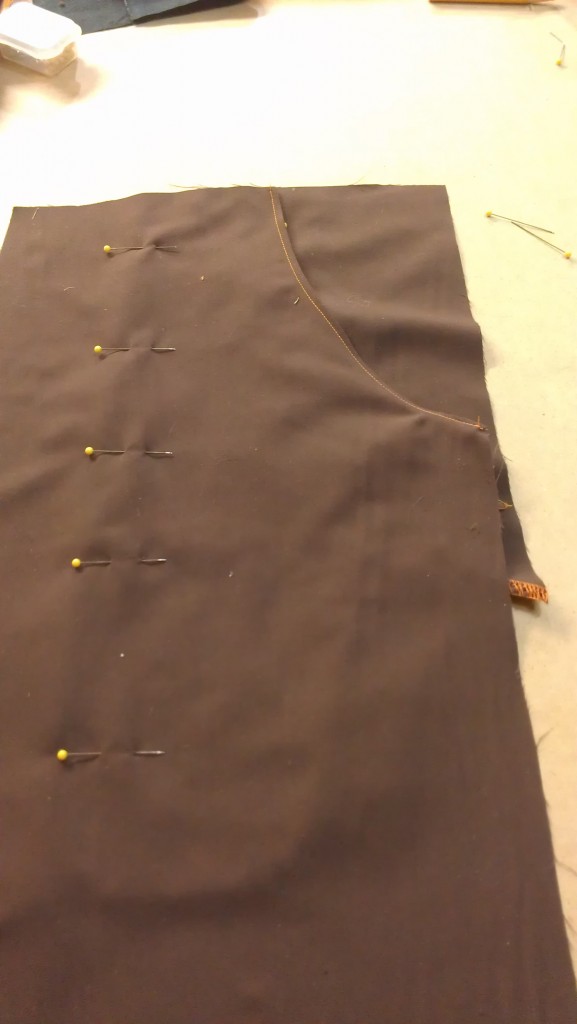
Back to the pants: pockets pinned flat–you can see the nonflatness at the bottom part, but it’ll look flat when it’s wrapped around a hip.

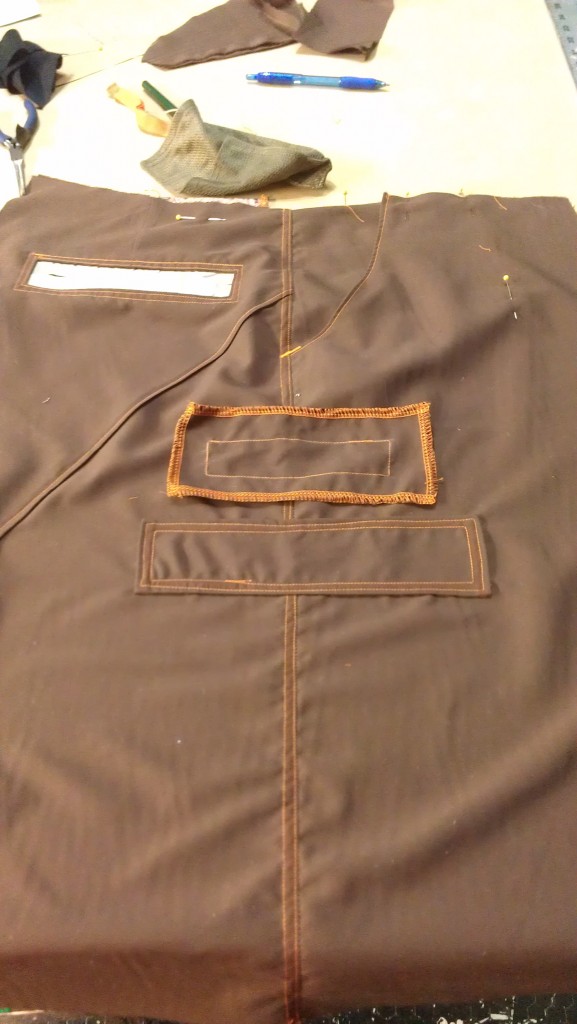
I finished off the side seams then placed the side pocket reinforcement rectangle. On one side, I also integrated an extra pocket from the khaki shorts. It needed a cut-out similar to the back pockets.

Orange zippers are no longer available locally, at least as far as I could find. Luckily, I had one on hand. Some people will look at my stash of materials as borderline hoarding, but how would they explain this zipper, installed right before Christmas and with no time to order online?

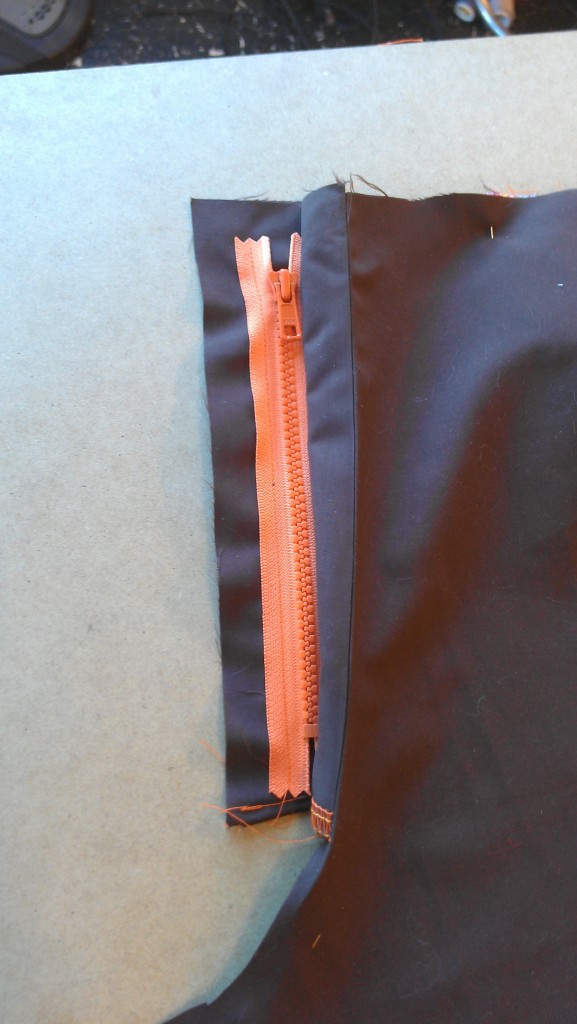
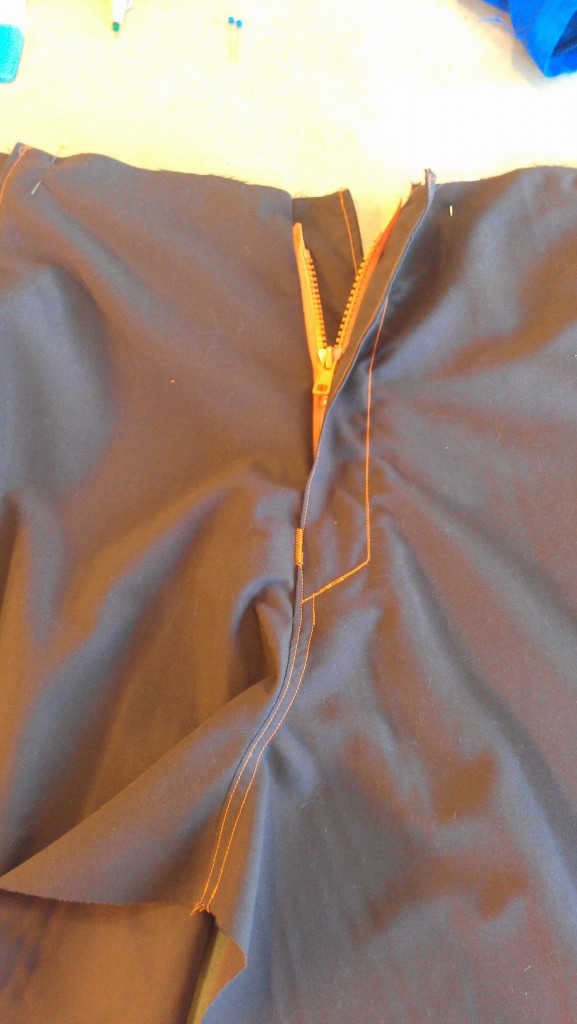
Starting the fly:

Finishing the fly:

I can put in an invisible zipper pretty much blindfolded, I never do welt zippers if I can help it, and I can count on my fingers–probably one hand–the number of fly-zippers I’ve installed. This one was practically easy–I must be getting smarter.

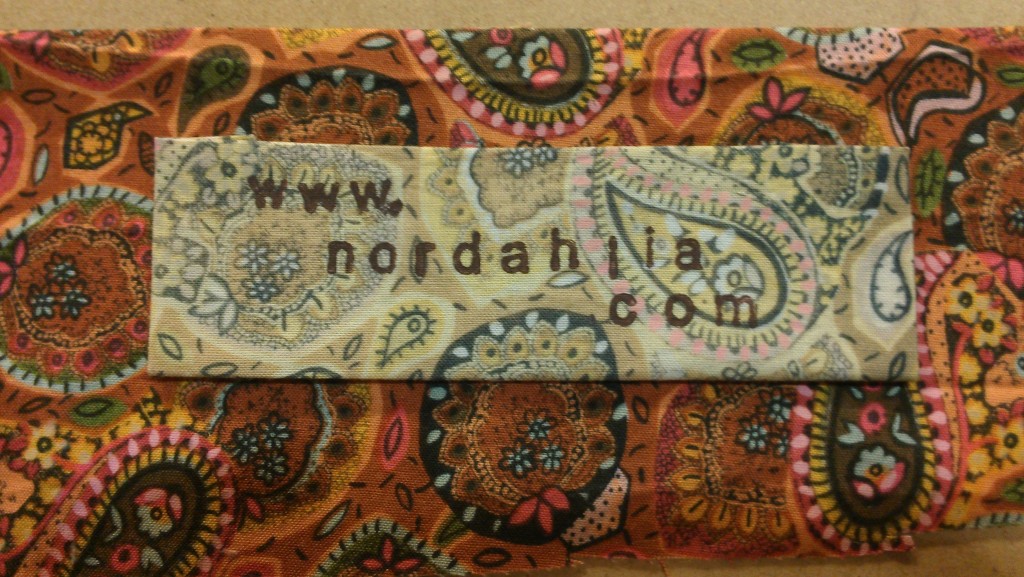
Partly in keeping with the original original-pants’ design that included large labels, as well as due to my desire to keep the inside of the waist as a “waistband” instead of having to use geometry to create a facing (I hid all the ease behind the label), I had some fun creating a specialty label:

No stamp would have turned up on the fabric as it was, so I soaked a scrap in bleach, then stamped it. I put a border of the regular fabric around the edge.


Racing Stripes

A client brought me a number of items that were just a little too small. A couple of them, I added what I like to mentally refer to as “racing stripes” up the side, though calling them that out loud to clients generally gets a negative response.

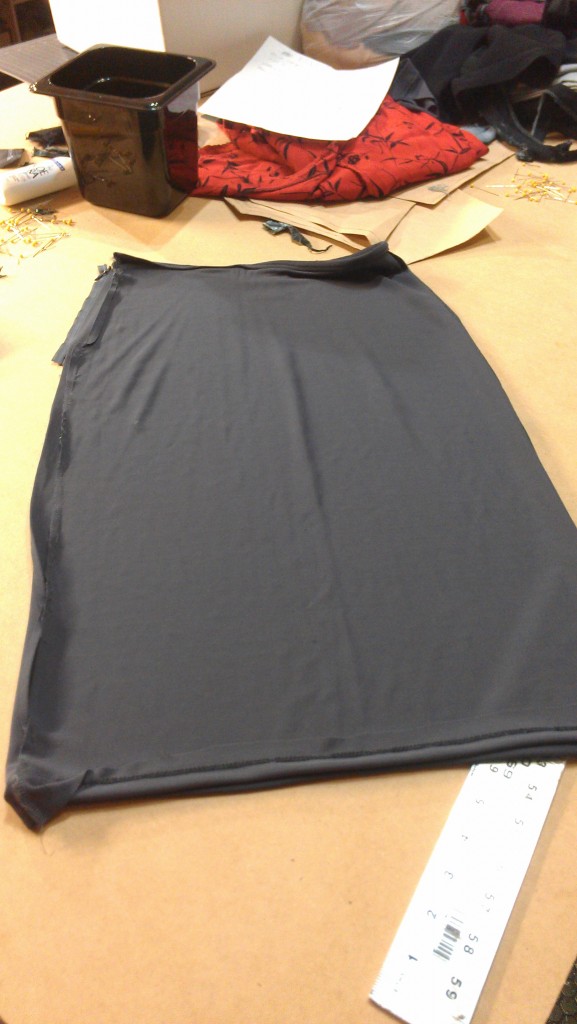
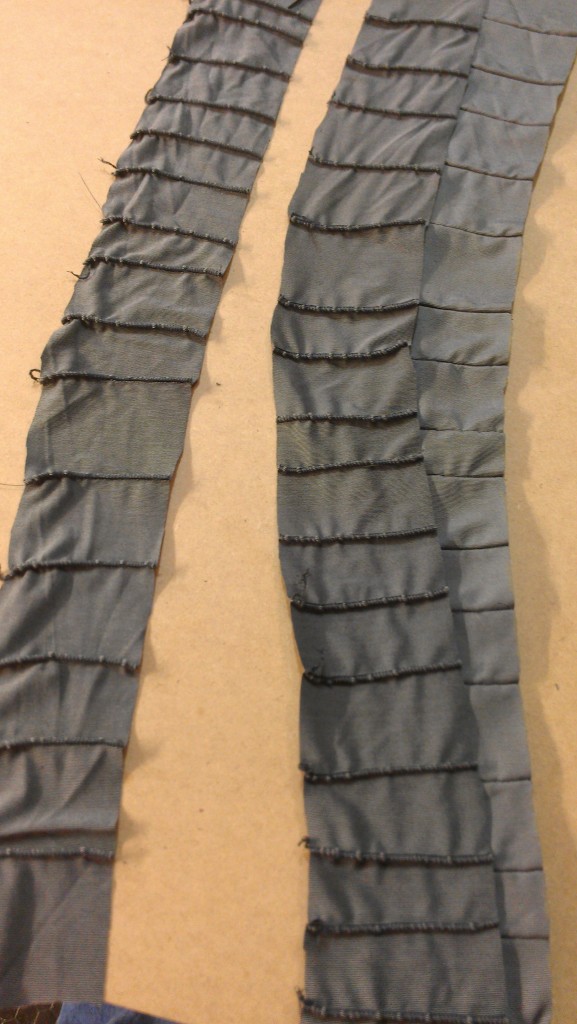
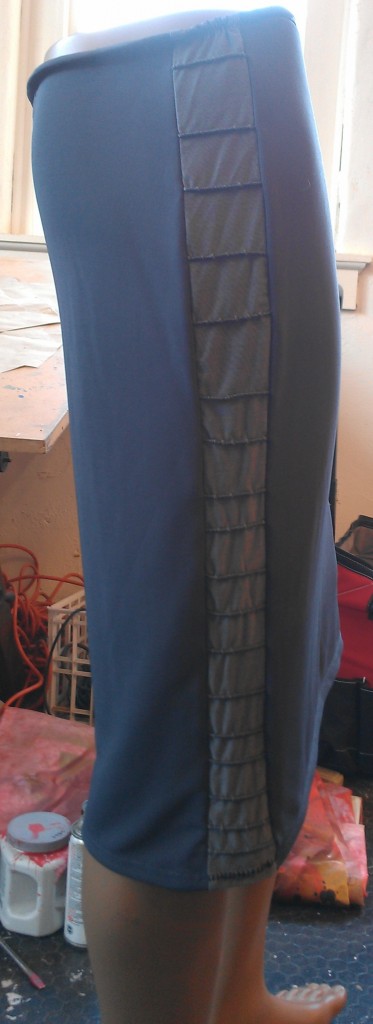
For both the jeans and the skirt, I added a contrasting grey stripe; for the skirt, I serged horizontal stripes to give it a textural difference and add some interest. I made one long piece that was more than wide enough for both sides, then cut it into strips:

And the results:

Dying Linen Pants: Do Not Try This at Home

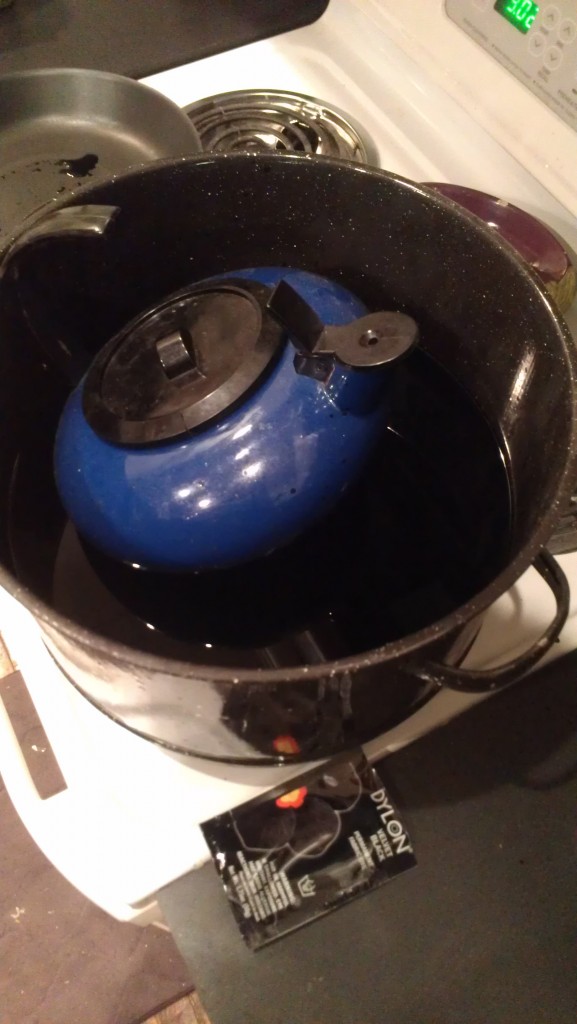
A client gave me a pair of pale green linen pants that had an unremovable spot on them and asked me to dye them black. In an attempt to get them as black as possible, rather than greyish, I used 3 packages of dye in as small an amount of water as possible. Since linen can shrink, I couldn’t boil the water or the pants themselves; I used sink-warm water. To keep the pants from floating, leaving some of the fabric outside of the dye and potentially making it splotchy, I weighted it down with heavy things–a large lid and a full kettle:

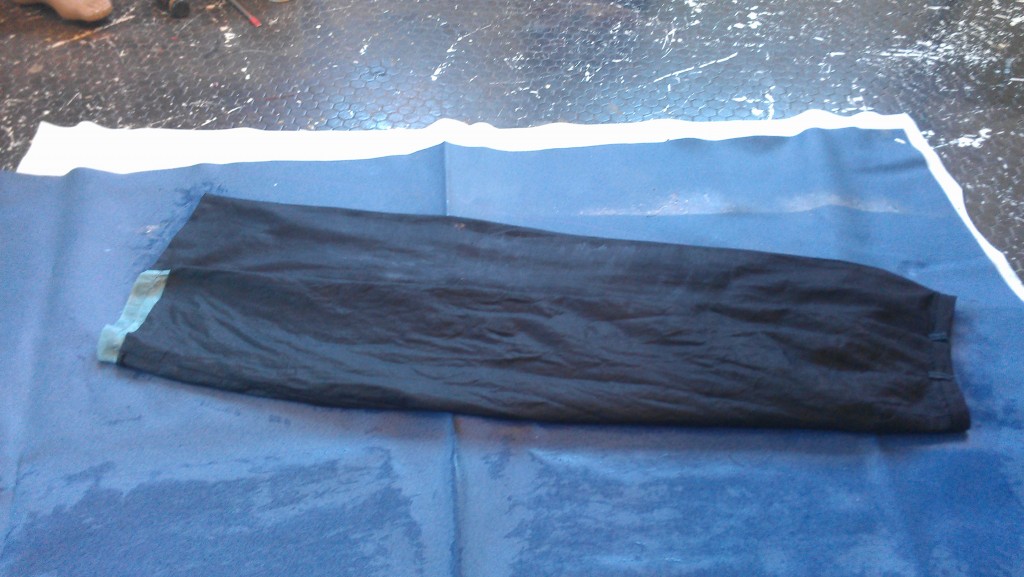
Usually, permanently and seriously setting dye into fabric involves washing in hot water and running it through the dryer. I settled for washing it in cold water, but still pulled it out of the washer about 4 inches smaller.

Here it is with the lining hanging out and a Barbie-sized waistband:

If you had asked me a week ago if clothes could be stretched out larger, I would have recalled the time in highschool when a friend of mine got sent to the office for a “paper stretcher,” essentially an academic snipe hunt, and I would have laughed at you. But while holding a client’s apparently ruined garment, I went ahead on a google search for fabric stretching.

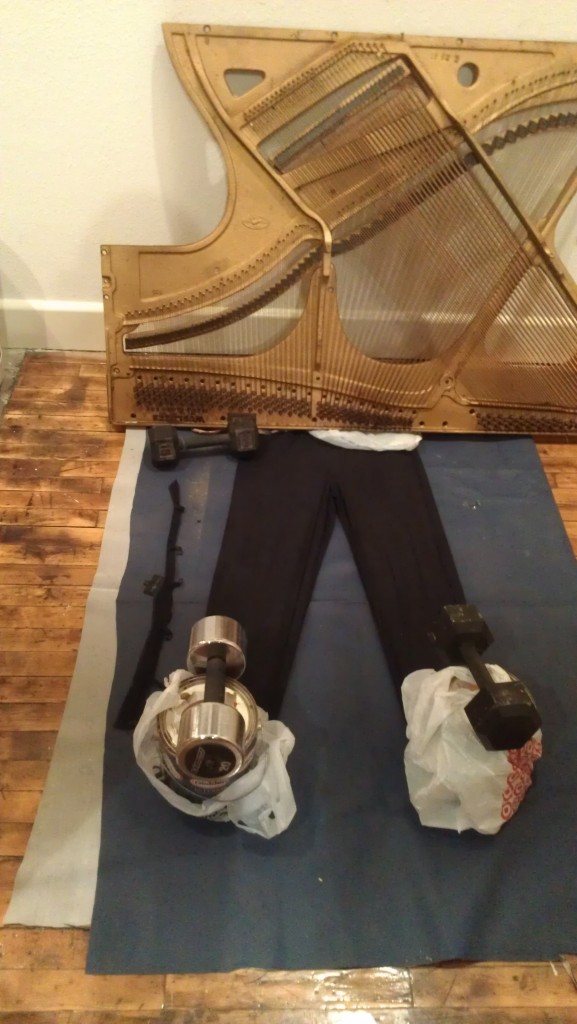
Turns out it IS possible. Most sites recommend soaking it in conditioner beforehand, which I did, though I’m not sure that’s entirely necessary. I used the piano harp to weight it on one end and some paint cans with handweights on top on the legs. I put the paint cans in plastic bags to protect the pants from whatever might be on the cans.

The pants mostly shrank up, but not so much side-to-side. The reason the waist looked like it shrank so much is because the grain of the waistband was horizontally the same as the vertical grain of the pants themselves. I had to pull off the waistband to effectively stretch the pants, and when I tried to stretch the band, the ease clipped into it ripped. So I gave the band up for lost and just stretched the belt loops.

It pulled back to the original length, but it became increasingly obvious that the dye had not set.

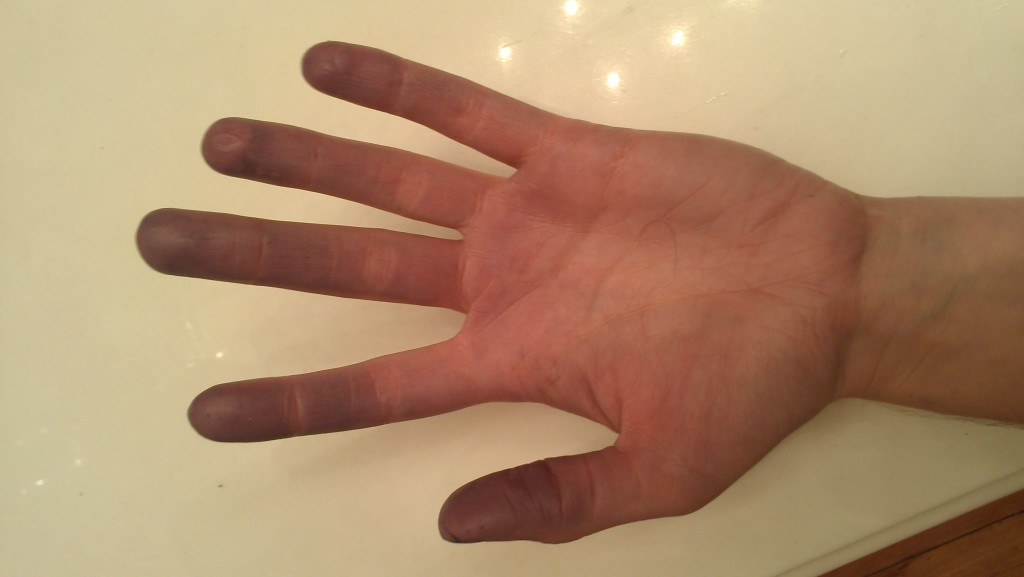
I didn’t wear gloves while messing around with the stretching and the dye kept coming off all over my hands. So I washed the pants in a gentle cycle of cold water with vinegar. I stitched the belt loops into a baggie made of scrap fabric so they could also be washed in the vinegar without getting lost.

The pants came out 2 inches shorter again, and the dye was still coming off to the touch. I washed them again, including more soaking time, in a larger quantity of vinegar, and they shrank back down by a total of 4 inches.

I stretched them again and made a new waistband. The client tried them on and was pleased with the color and happy with the length. They’re still a little bit too narrow in the hips,  so I do need to attempt to stretch them out more horizontally, though it’s only by about an inch at the most.

Racing Stripes

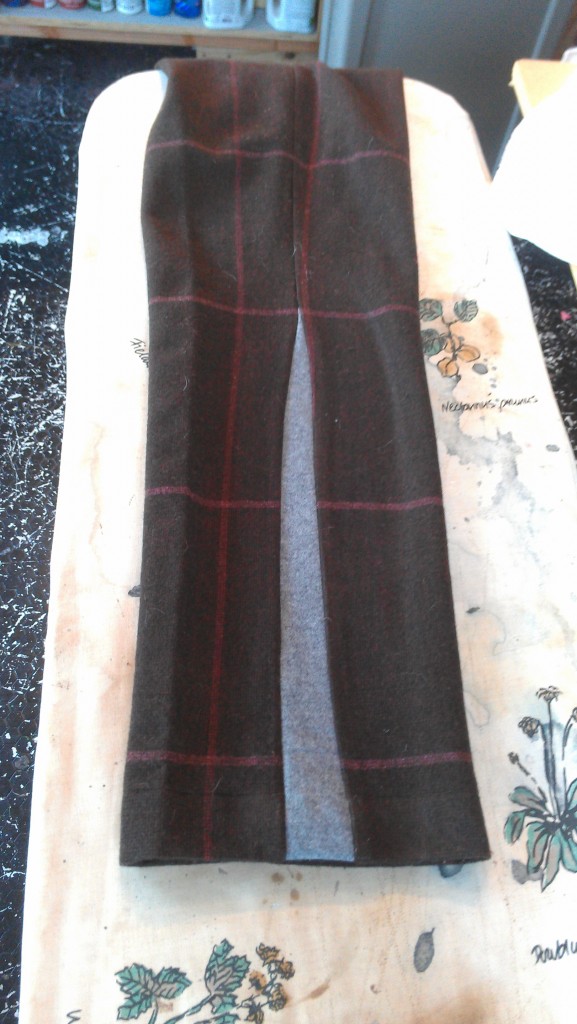
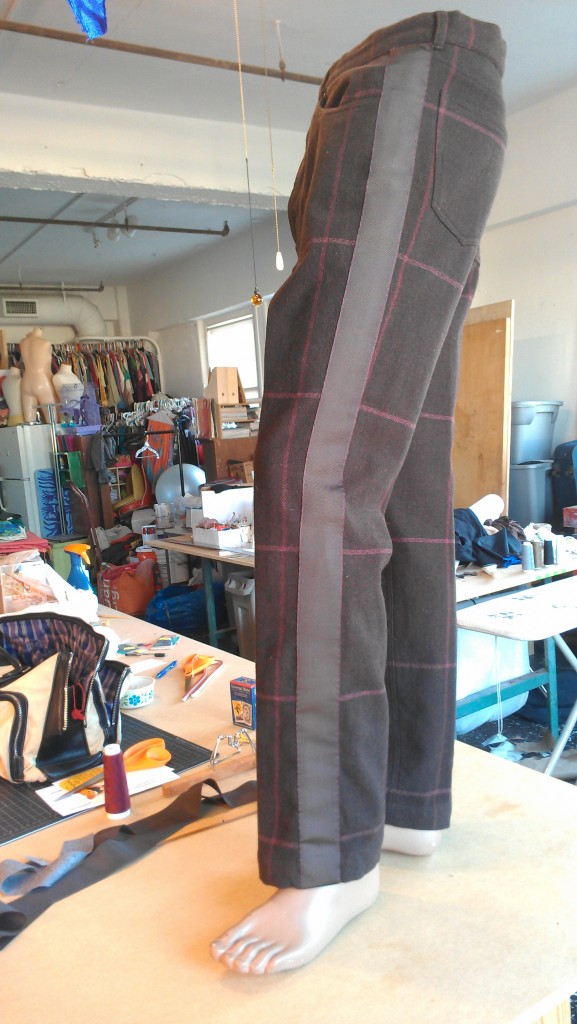
These are some wool slacks cut like skinny jeans, with rivets and everything. The client generally wears boots, so I added some similar-weight cashmere godets in the side seams up to the knee.

I stitched some scrap fabric over the rivets so they wouldn’t poke out and wear on the ribbon or look lumpy.

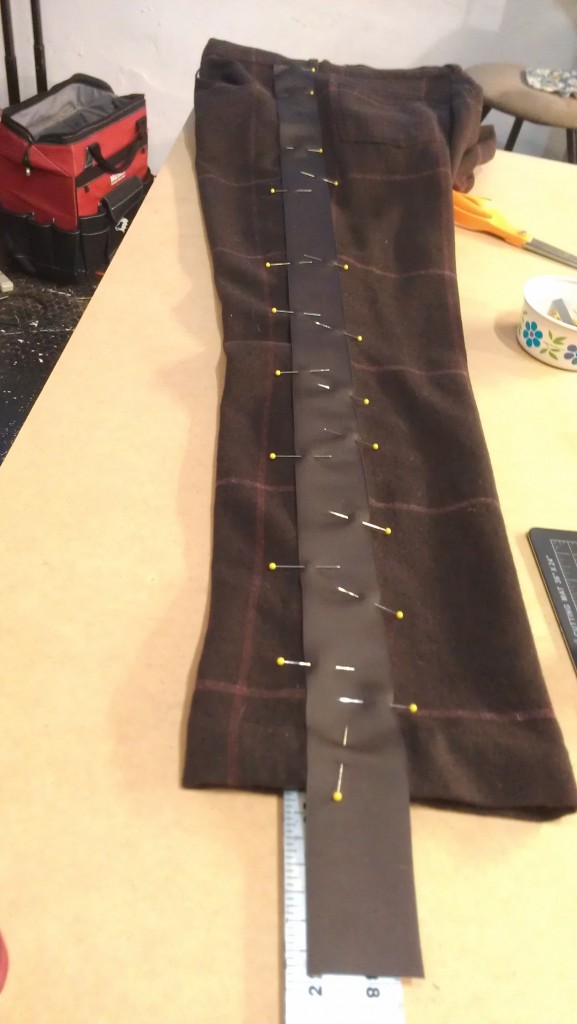
I pinned this grosgrain ribbon up the side seam with a ruler inside the leg so I wouldn’t pin through more than one layer of fabric:

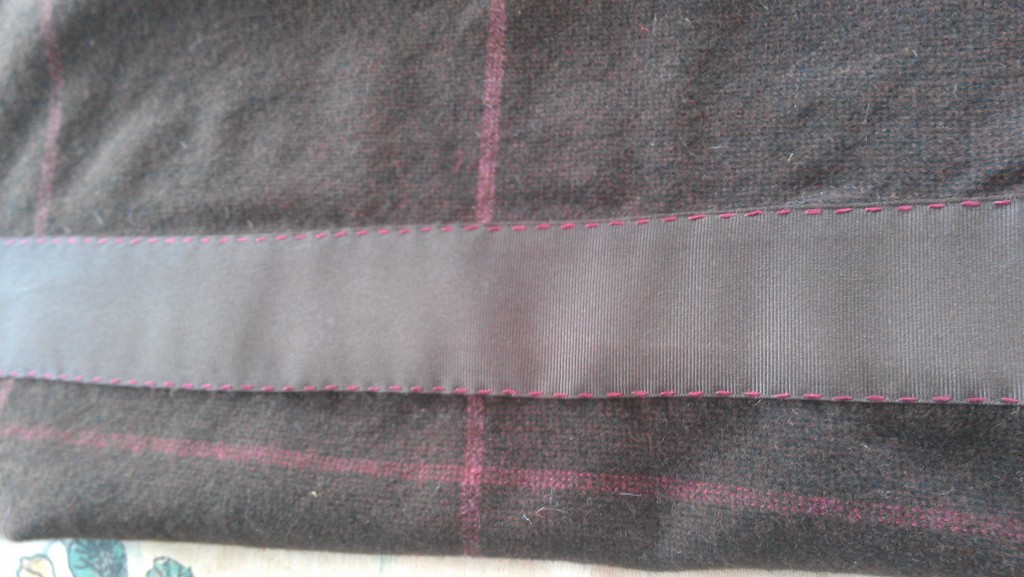
I matched the maroon of the stripes in the fabric and quadrupled the thread so it would show up. The grosgrain stripes made it easy to keep the stitches even–4 stripes on, 4 stripes off.

It came out looking pretty sharp:

Pants!

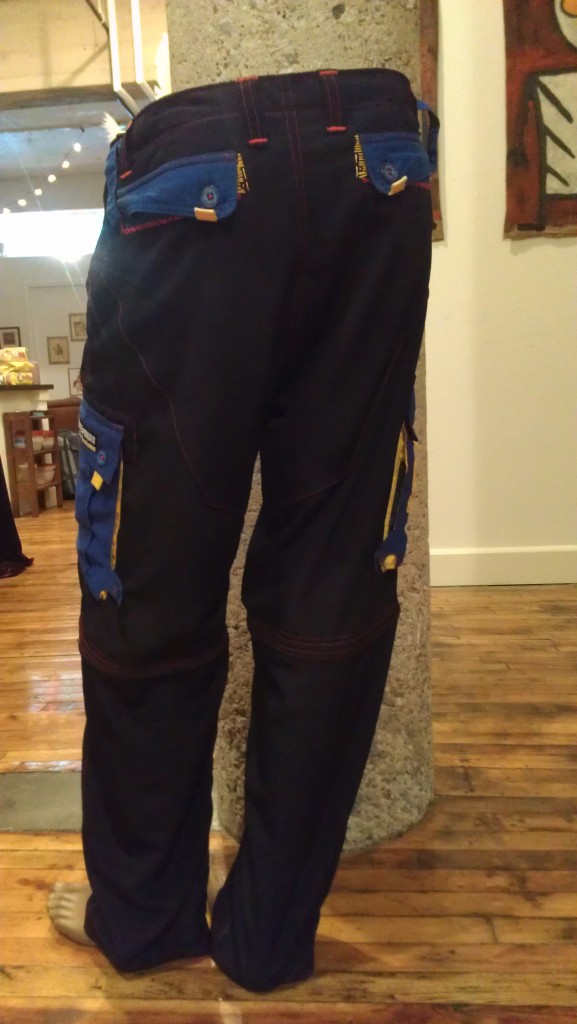
Last spring, a gentleman finally threw away his favorite (and discontinued) pants, as they were beyond repair. His very excellent wife, unbeknownst to him, retrieved them and handed them over to me to copy. Several months pass in which he has no expectation of seeing his pants again.

The Project: copy the old pants, make new ones, and incorporate the first pair into the replacement


The fabric was a sort of peachskin, which is a fairly broad description for fabrics which, although I am sitting here literally fingertaps away from finding out for sure, I am going to assume is made from brushing one side to make it soft. I’ve been on a search before for a heavier-weight peachskin fabric and come up empty-handed, despite visiting the fabric warehouse district, Joann’s, Hancock’s, and getting samples online. Luckily, Joann’s just so happened to have a current line of peachskin fabrics that were close enough. I picked the black fabric as it felt slightly closer to the original than the other colors.

Step one: make a pattern. There are ways to do this without dismantling the original, but as that is not always as easy and accurate, and as these pants are trash anyway, I went ahead and ripped out several of the seams.

Paper pattern:
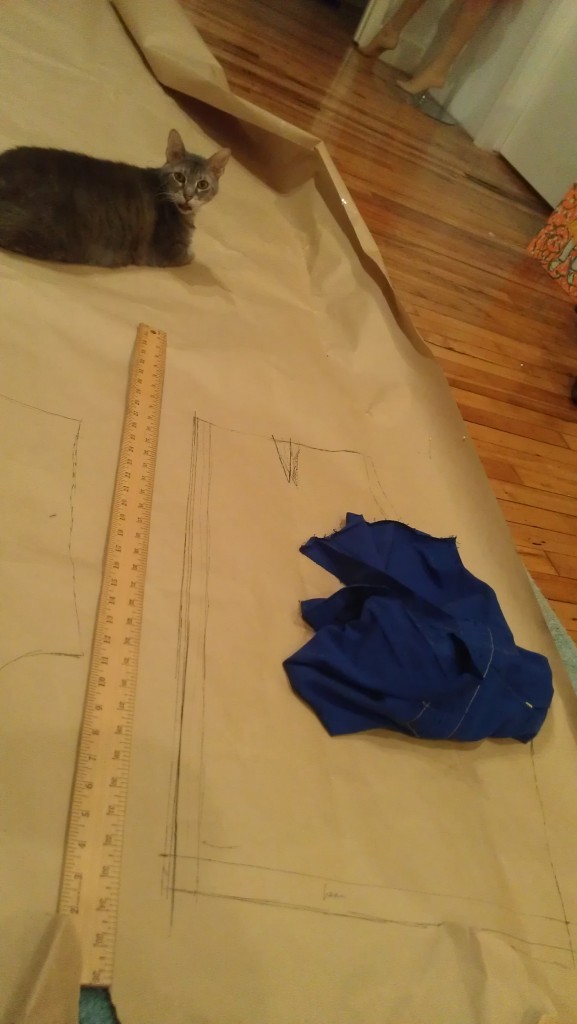
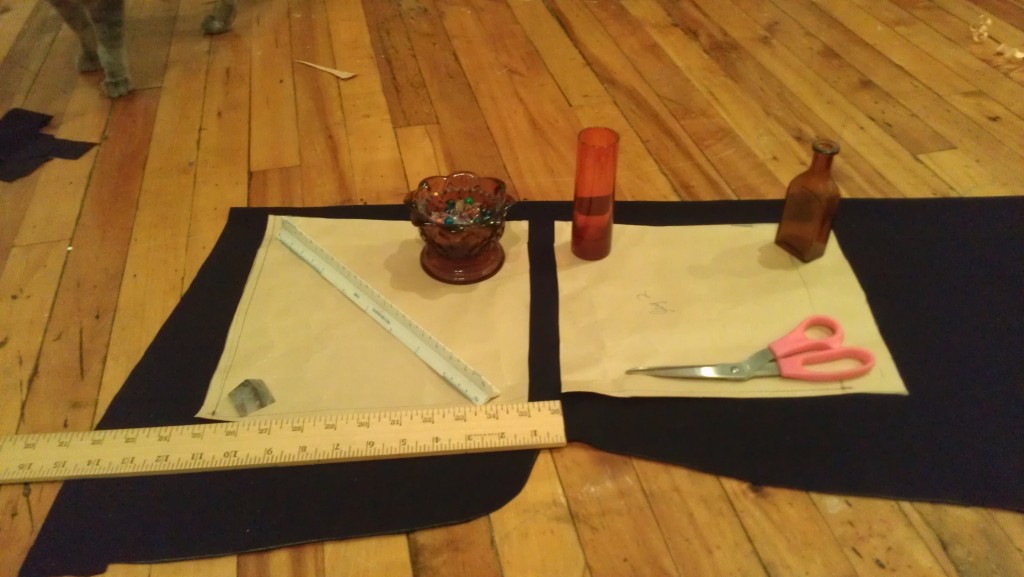
While copying the lower legs, I remembered that the client had said the originals were actually a little short. Since this was a simple pattern piece, I just cut it in half horizontally, measured an inch space between them and weighted the piece on the fabric.
I remembered at the last minute to take a picture of the original before completely cutting it up:
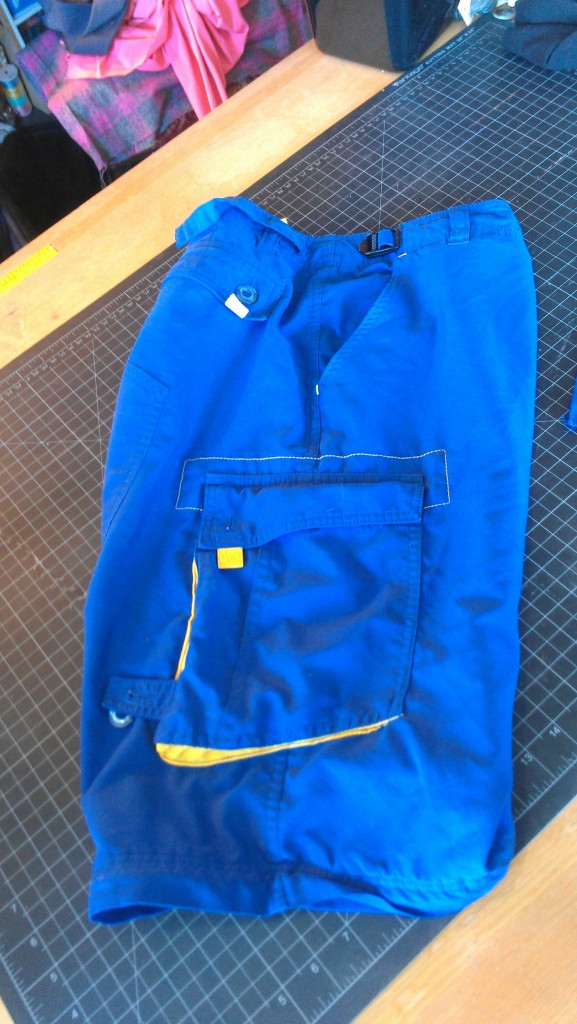
On the left, you can kind of see the seam from where the butt-reinforcer stops short. It only comes about halfway up the back of the pants, and the final tear was just above it. I decided to expand the reinforcement to cover the entire back up to the waistband.

Improvised on the back pockets, using the reinforcing piece as the facing:
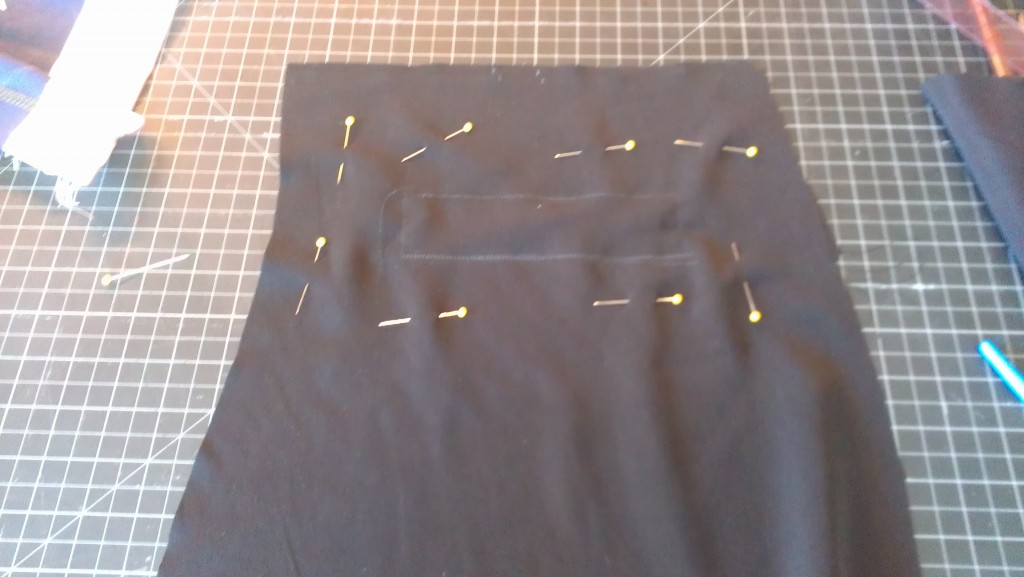
Stitch over the chalk rectangle, cut a slit and fold the fabric through to create a finished edge around the inside of the rectangle.

I cut off the original blue back pockets, satin-stiched them into place on the new pants. The right leg has the reinforced back top-stiched into place (I decided to go with red), while the left one has not been finished off yet:
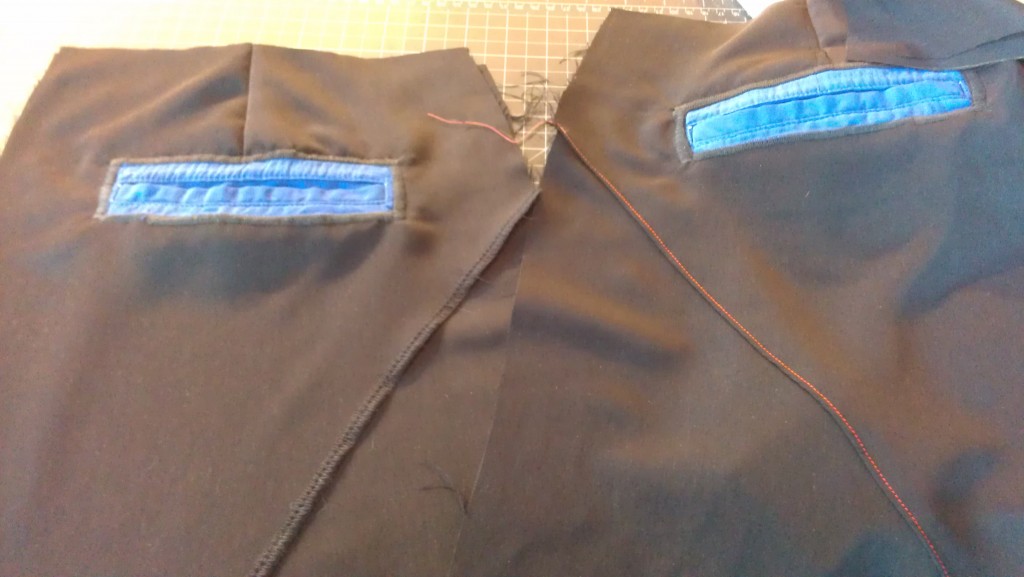
In summary:

1. Make a pattern

2. Sew on the back pockets

3. ????

4. Pants!
 

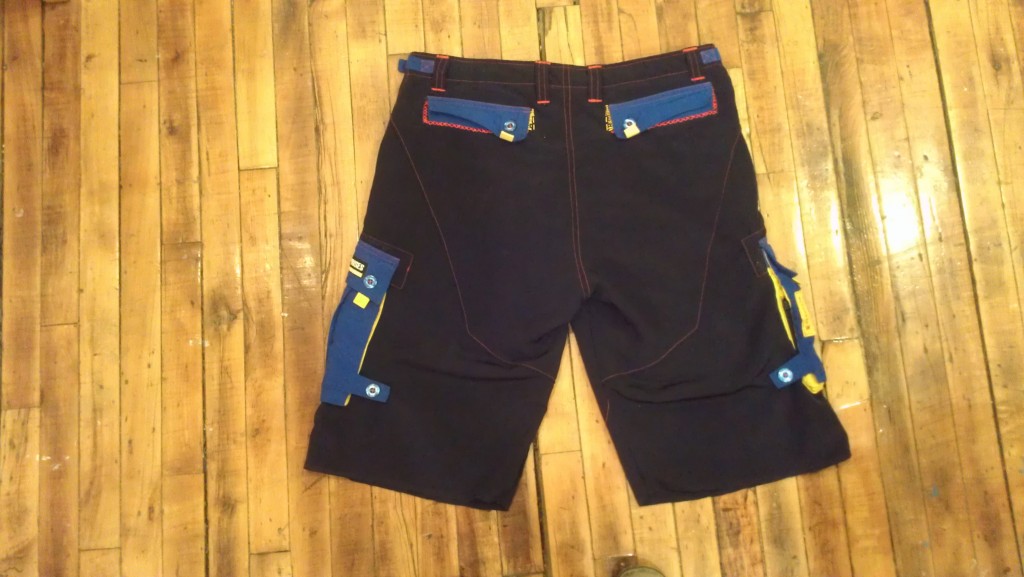
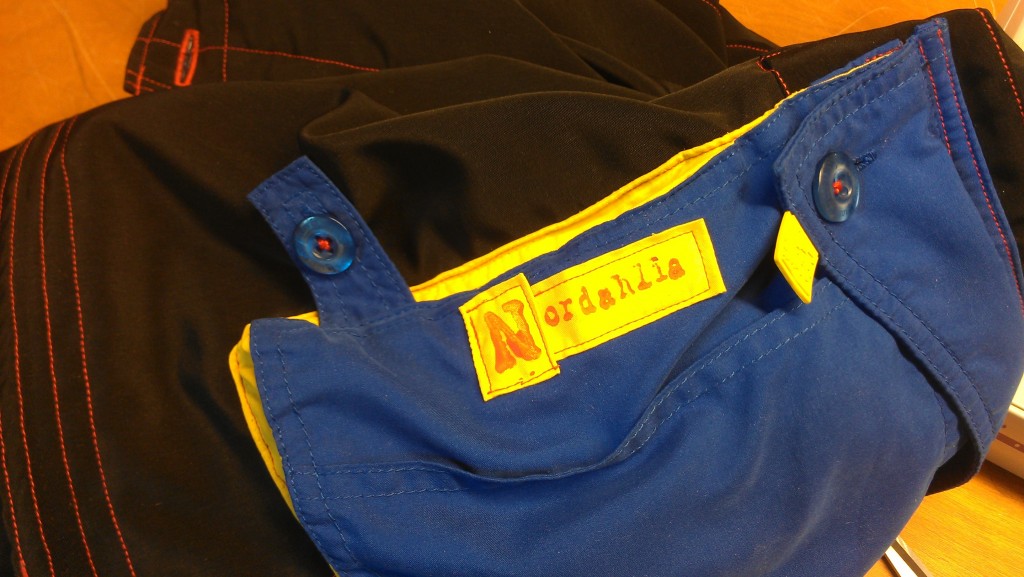
I used as much of the original pants as possible. One of the blue buttons was missing, so I dug through my yellow-button drawer and found one that matched the yellow fabric. I found a tempting red one as well, but the shade made the red top-stitching seem more pink.
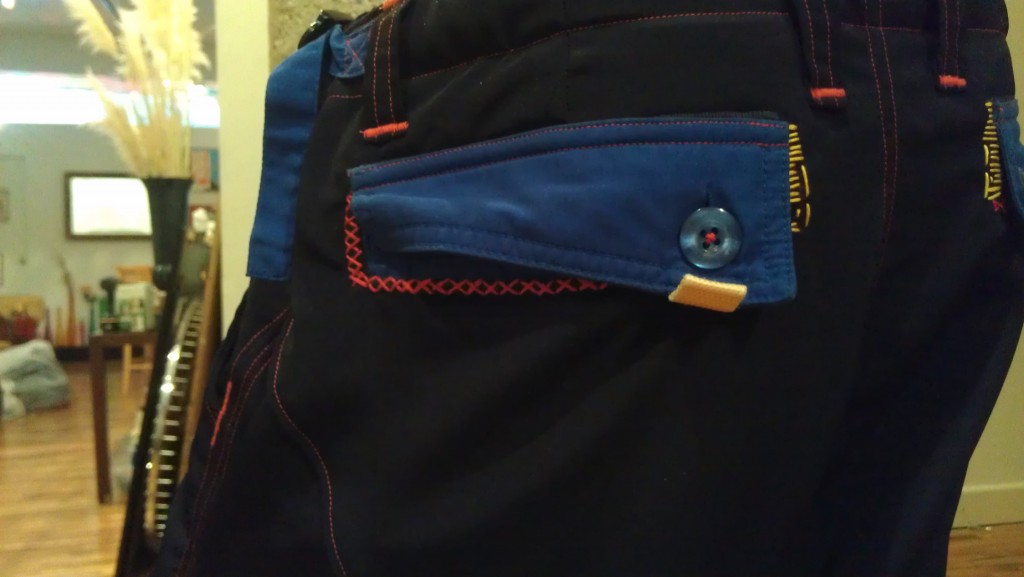
I added some hand-stitching with embroidery thread around the edges of the back pockets as the machine top-stitching came out looking yo-mama homemade instead of handmade.

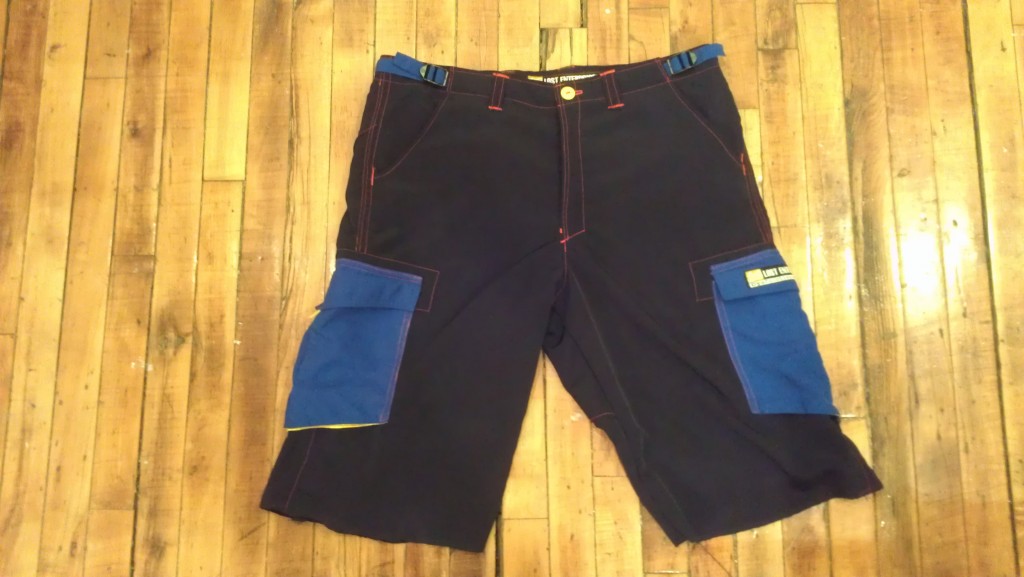
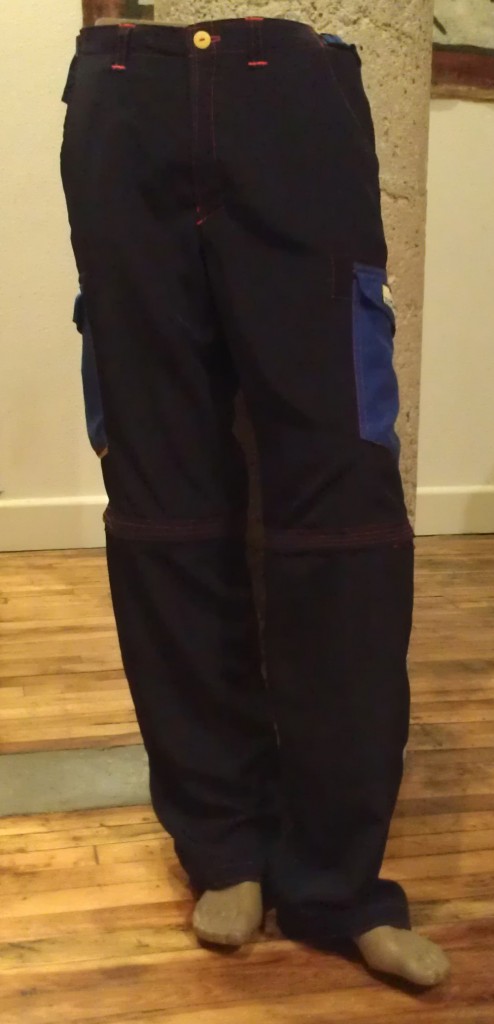
This is the top half of some removable-bottom pants that could be transformed into shorts. At this point in the process, it was like climbing down the other side of Mt. Everest. Still a challenge, but not nearly as exciting as the first part. Kinda ready to pitch a tent and hang out for a bit. Admire the view, dwell on the challenges overcome.

Birthday deadline coming up soon :: storm coming in over the horizon.

Have to head back down, ignore temptations to dawdle.
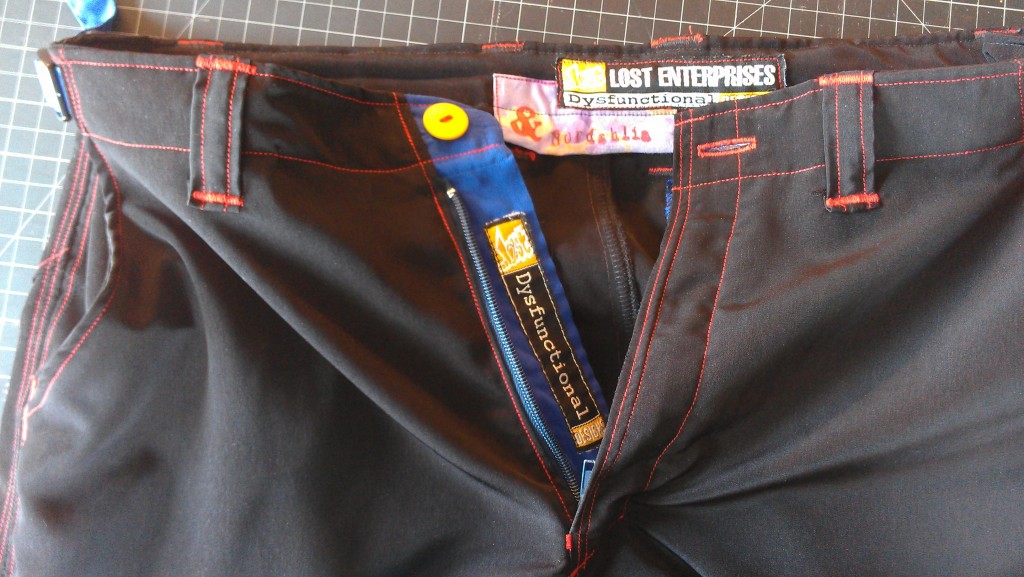
I kept the original fly-pieces. Yes, the label “dysfunctional” was there originally. I put the back-of-waist label in, and made one of my own to go with it. Partly because I’m cool like that, and partly because it bridged a gap and made it possible for me to use a waistband instead having to measure out a facing on the inside and geometrically allow for the back darts.
As the original design included other decorative labels, I decided to stamp my brand onto some of the old yellow fabric to cover up a hole in a pocket. I could NOT get the N right, so I decided to stop wrestling with the tiny N stamp and make it look like a design element.
I’m not a big fan of sewing pants, which is the cause and the effect of almost never making them. While, apparently, everyone else figures out welt zippers and then freaks out about invisible zippers, I’ve taken the opposite path. I can just about do invisible zippers with my eyes closed, but welt zipper style and jeans fly?? I’ve always viewed them with that “step one, step two, then a miracle occurs, zipper!” attitude. Plus, I’m going to have to reset my perceptions for pants in general, and menswear in particular, in regard to work vs. reward. I can pretty quickly add a flounce of some kind to a skirt–they can look complicated and eye-catching without spending much time. However, the elements that go into menswear and pants are time-consuming, require more exacting placement, and aren’t generally admired so much as expected.

While working on these pants, I decided to take the opportunity to think about my attitude about potential projects. Before starting, I was really reluctant, I thought they would be harder than they turned out to be, and was put off by the expected tediousness of all the small and subtle elements. I contemplated a future of only accepting projects that were fabulously exciting from the outset.

The encouragement to add a lot of color and get creative really helped get me going. Through the rest of the process, I thought a lot about how much he would appreciate the gesture from his loving wife resulting in his pants’ resurrection.
As I’ve dabbled in menswear and discovered how hard it is to find ways to change them and add design elements without turning them into girl clothes, I enjoyed figuring out creative touches to these pants that wouldn’t make the color choice scream 80’s.

I checked in with the client after her husband’s birthday party. My initial plan, as there was a bit of uncertainty about the proper length, was to leave them extra long and unfinished. Then I realized it’s no fun to unwrap your favorite pants and have to wait to have them tailored. So I went ahead and finished them at the length we suspected.

Turns out they were perfect–exactly the right length. Dude put them on immediately, wore them the next day as well, absolutely loved them. So gratifying.